
 Get Microsoft Ads setup, tools and coupon for
  free!
free! 


At the beginning of December, we informed you about a change in the billing system in the BlueWinston application.
Following this change, each client needs to set up their billing and payment details in their BlueWinston account, or choose the preferred payment method for using the BlueWinston tool.
As this is an important step to ensure the smooth operation of the service, we have prepared a clear and simple guide to walk you through the entire setup process.
Detailed step-by-step instructions:
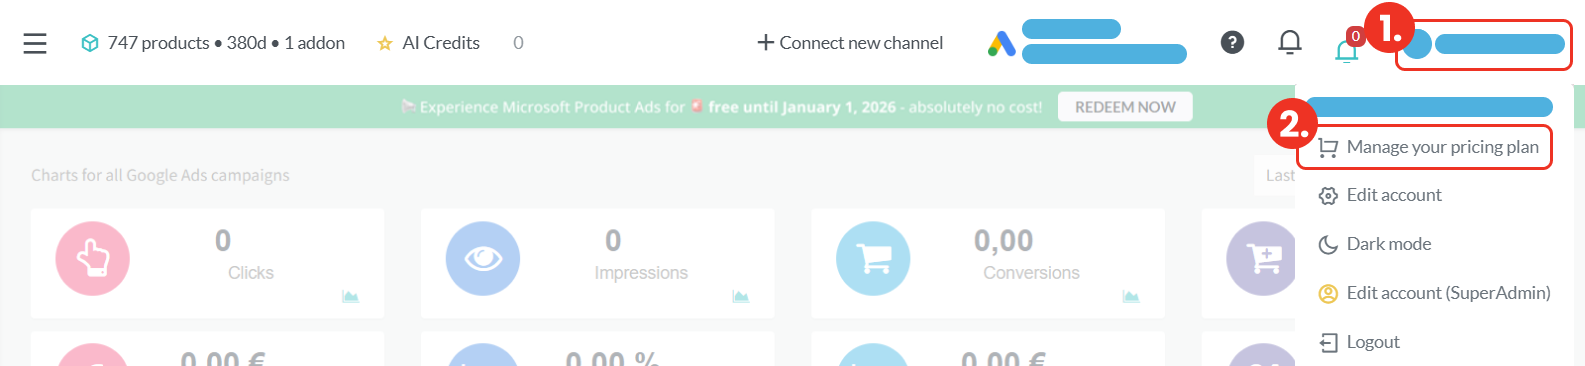
After logging into the BlueWinston application, you need to navigate to the billing section. You can do this by clicking on your account in the top-right corner (step 1) and then selecting “Manage your pricing plan” (step 2).
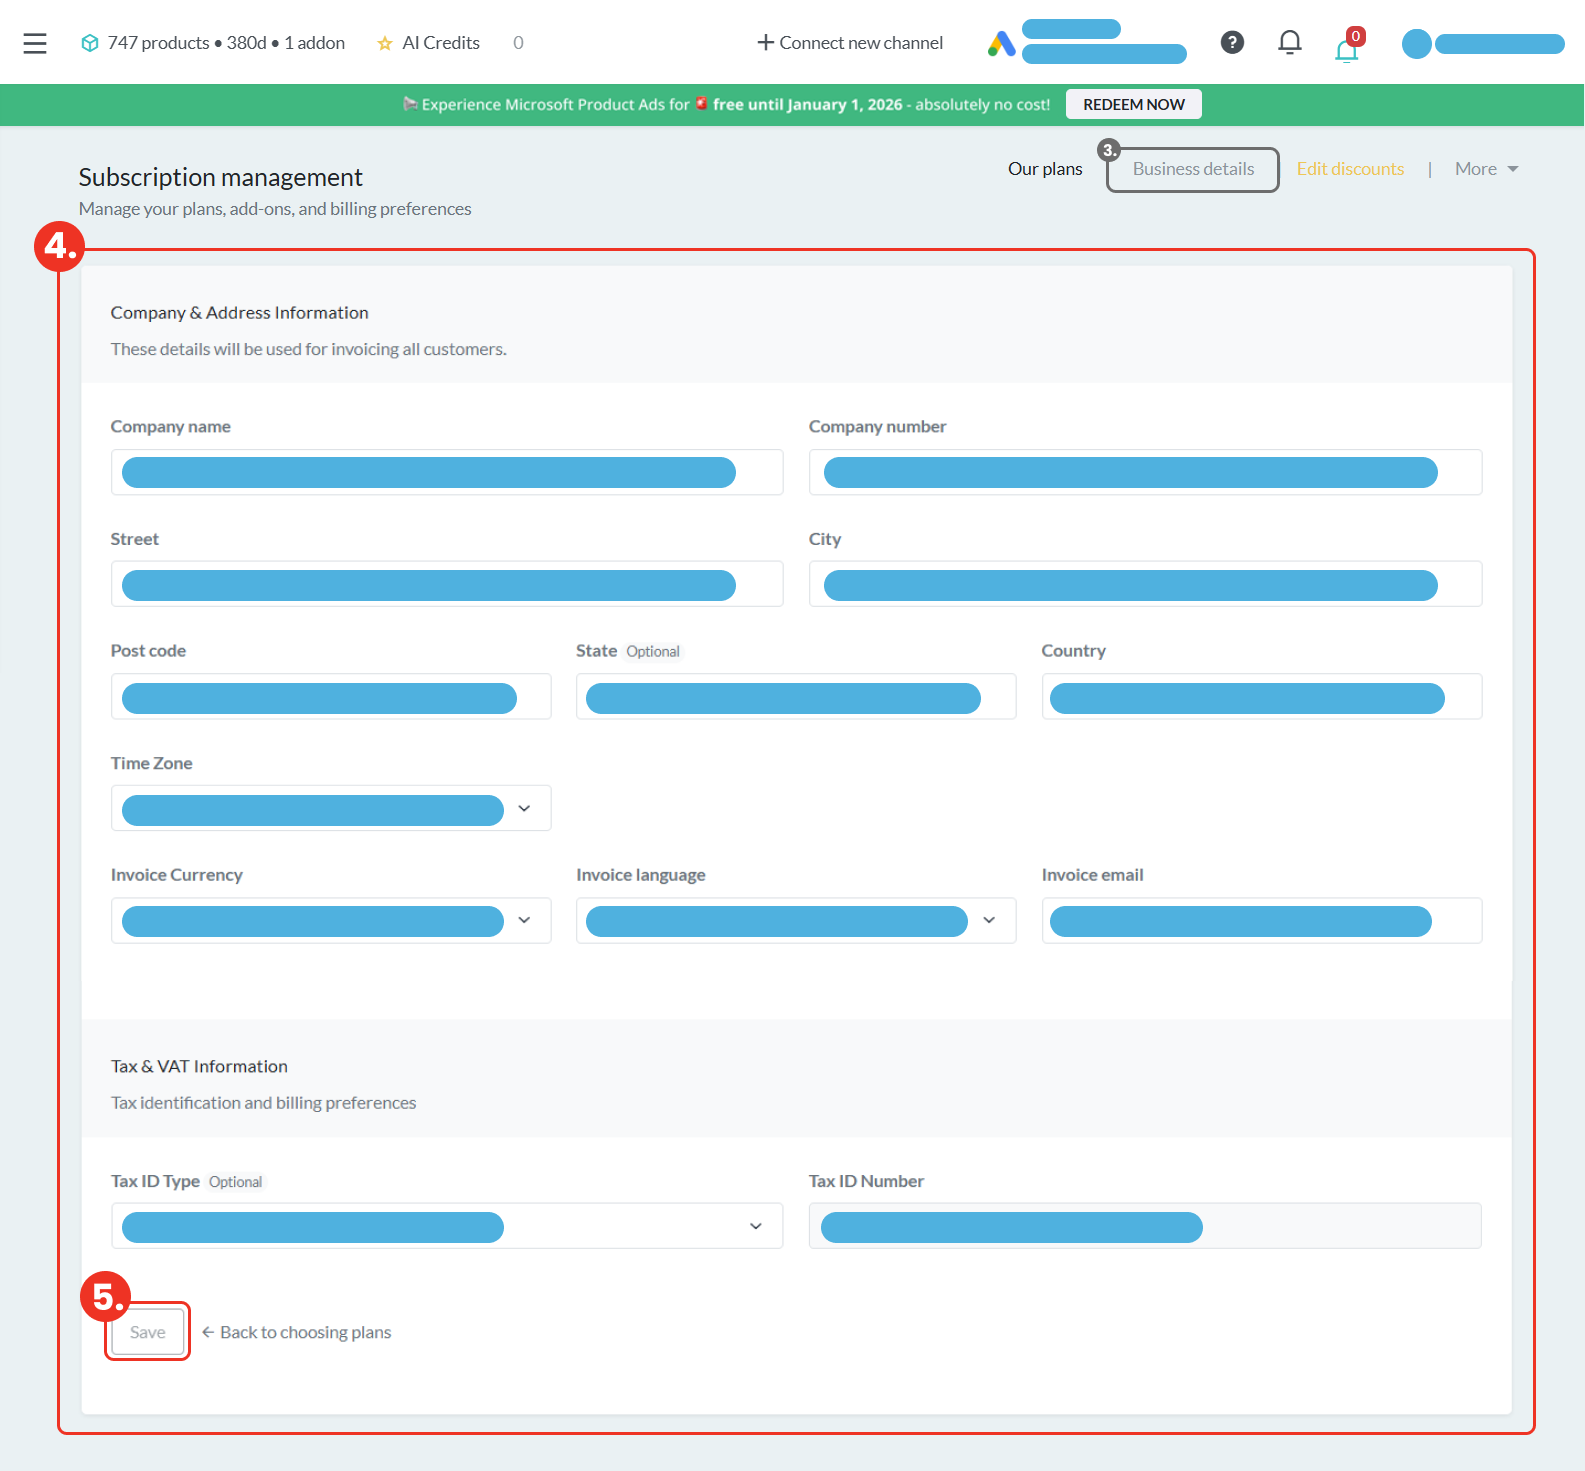
After clicking this option, you will be taken to the Subscription management section, where you should select “Business details” in the top-right area (step 3).

This will redirect you to the Company & Address Information section, where you should fill in all the required details (step 4). Once completed, make sure to save the information by clicking the “Save” button (step 5).
ATTENTION! If you wish to pay by BANK TRANSFER instead of by card, after completing step 5, please follow this GUIDE.
(Note: continue from step 5.)
Next, return to the settings options in the top-right corner. Instead of “Business details”, select “More” (step 6). In this section, open “Payment methods” (step 7).

Here, click on “+ Add new payment method” (step 8) and enter the required payment details.

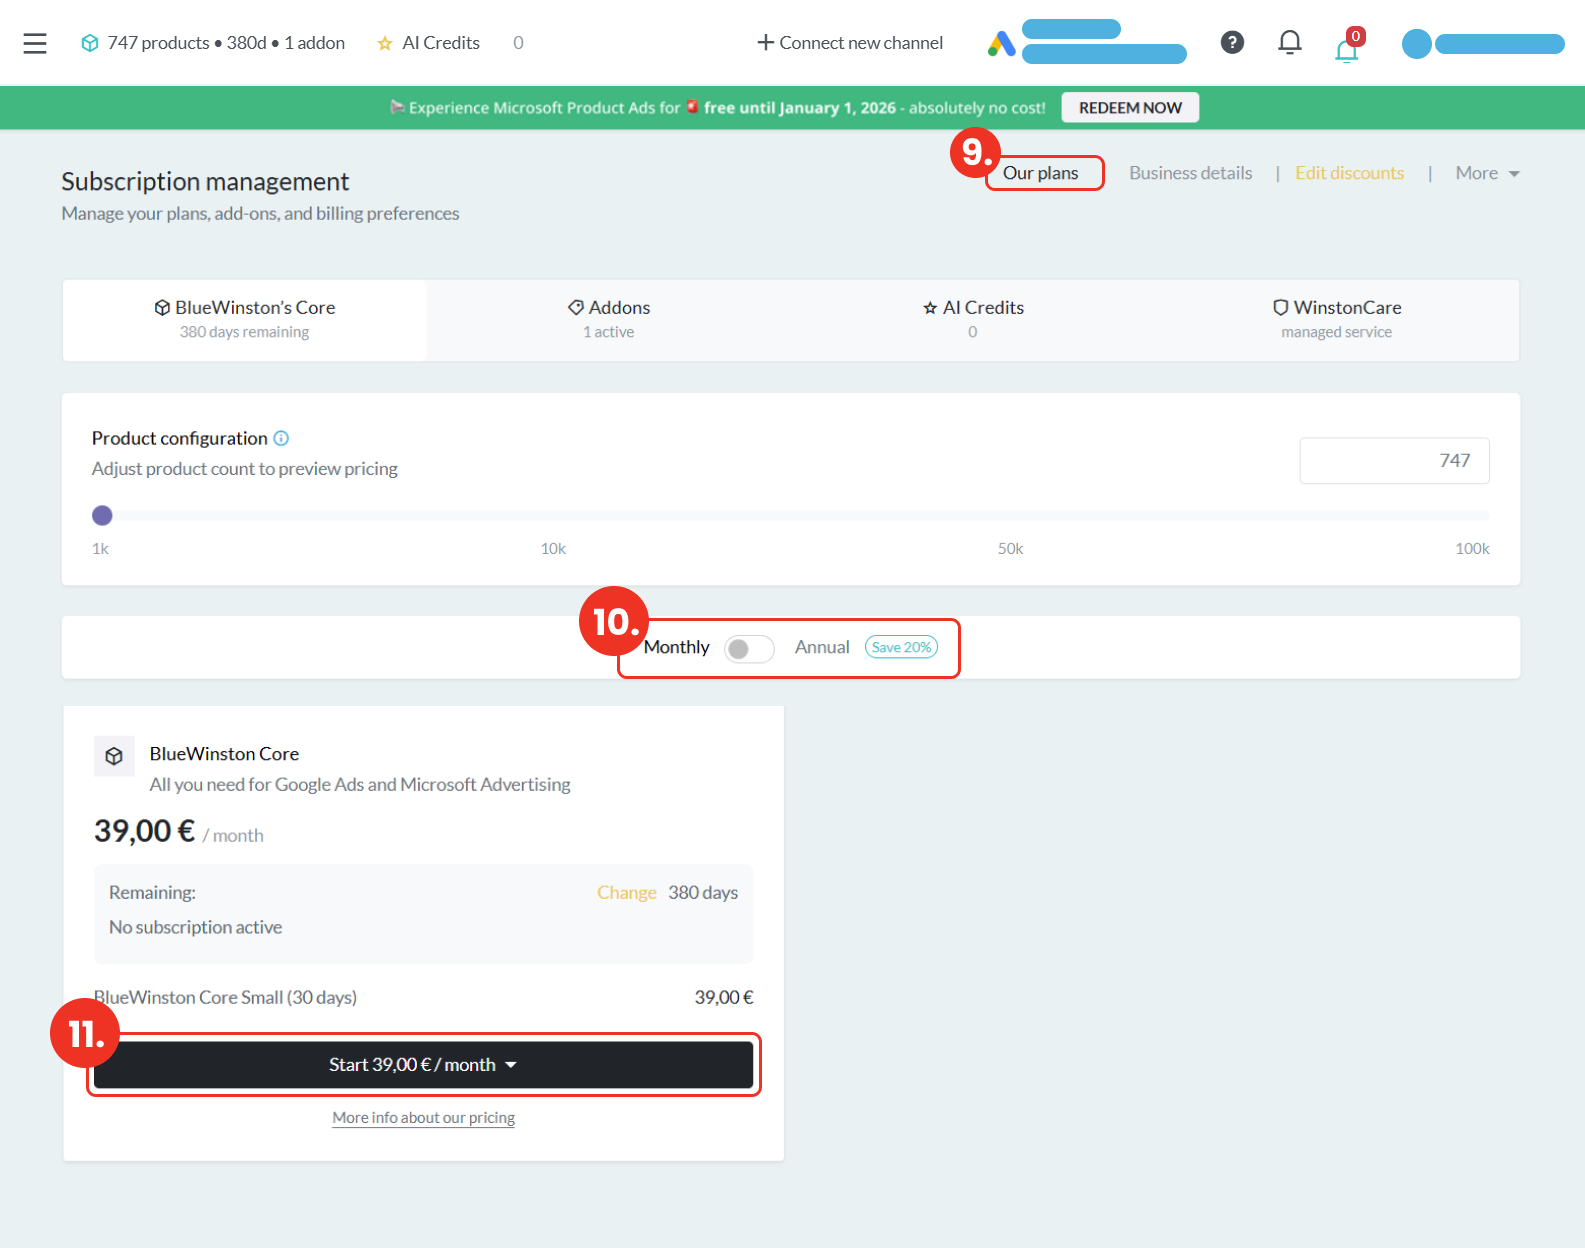
After adding the payment method, proceed to the “Our plans” section (step 9), where you can choose one of the available payment options – monthly or yearly (step 10). After selecting your preferred plan, scroll down and click the “Start” button (step 11). You will then be prompted to select a payment method, where you need to choose your preferred payment option (credit card/bank transfer).
*The BlueWinston system may prompt you once more to confirm your selection by clicking the “Start” button. If this happens, simply click “Start” again to confirm.
AND THAT’S IT!
Once these steps are completed, all required information will be correctly set up and BlueWinston will continue to work without any complications.
Please note that if you have multiple accounts, these changes need to be made separately in each of them.
If you have any questions or encounter any issues during the setup, please do not hesitate to contact us at [email protected]. We will be happy to help you.
